I’m sure that I’m like bazillions of other moms out there that occasionally, while surfing the web a week before a kids’ birthday, come across a flat out gorgeous and mind-blowing fondant cake that is entirely outside the realm of possibility. I mean, who has the time to do that kind of work?
I had one co-worker who frequently took the time to make amazing cakes for our office and I always wondered why she did it.
But then, I’m the woman who stayed up, literally, all night to make my 500th bento, so I shouldn’t scoff.
The 2nd Annual Edible Book Contest at the University of Hawaii was held today and I decided to do a Hunger Games cake a little over a month ago when I heard about the contest. I started off with a sketch.
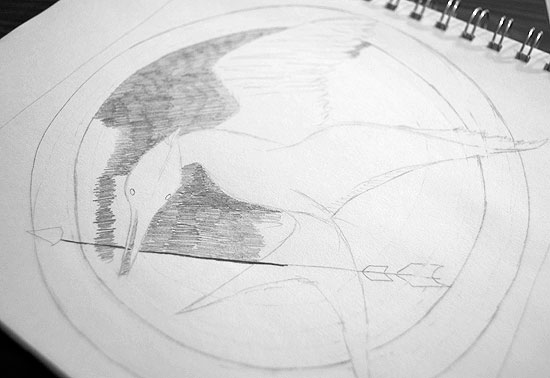
I worked on this for quite some time and while filling in the dark areas I realized that I had no other details except the title in mind and I was just drawing what was already on the cover of the book. I stopped work on the sketch and on Wednesday night, began work on the mockingjay, which would be the focal point of the cake.
Several years ago, Mr. Pikko bought me a Wilton Gum Paste Flower-Making Set from my wishlist so that I could use the little itty bitty flower cutters for my bentos. Finally, years later, after leaving the big “useless” ones in a drawer gathering dust, I had a use for them.
And they were nowhere to be found.
I searched the kitchen twice, looking in unpacked bags of bento stuff and pulling out drawers. I was pretty mad at myself, but decided to do one more sweep before giving up. In the end, I didn’t find the bag of straggler cutters, but I did find just the right one I needed for the feathers. If you look at the picture on Amazon, it’s the one in the middle with three pointy tips.
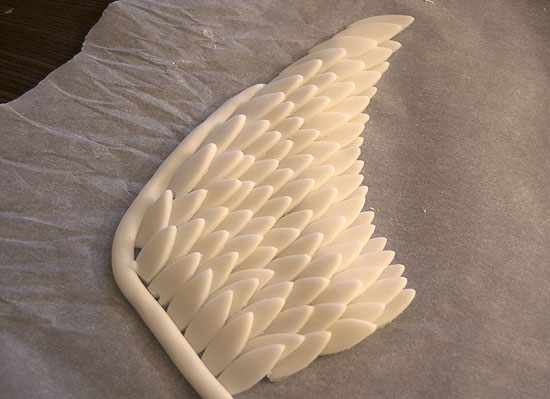
I laid it all out, not knowing what to do until I had enough. Eventually, I decided I liked it as-is and so this left me with the dilemma of how I’d “glue” it together with it already in place. I decided to just use a toothpick to stick the piping gel I’d bought at Ben Franklin underneath the feathers and it ended up working. The piping gel was a bit frustrating as after I bought it, I looked at the jar and as you can see, the label is distinctly orange. So I thought, well dang it, I bought orange piping gel. After a phone call to the store in which they told me they didn’t know either, I realized that it was actually clear, since the instructions said to color it.
Still, when I opened it up, the dang stuff was orange-y. It came out clear in small amounts though, whew!
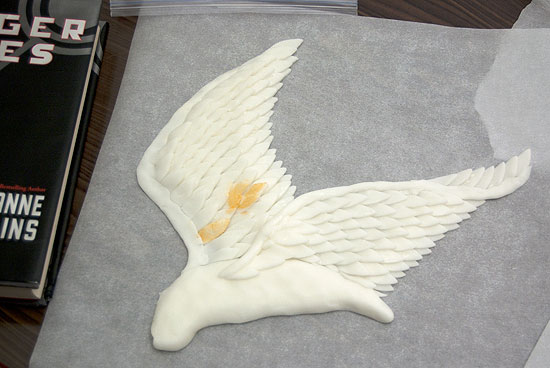
On Thursday, I began work on the second wing, which was much harder to do. I had to mold a lump of fondant into a shape that looked like the mockingjay’s body, then added a long, rolled out piece near the front. I laid it out and added the back feathers, by this time being confident enough to just glue them on right away. I then worked my way down from the tip to the tail of the body, then worked my way toward the front of the bird.
After I was done, I realized that the wing looked too flat, so I had to start shoving lumps of fondant under the wing to lift it up a bit. Luckily, the gel had dried pretty well and I could lift the whole thing up without incident.
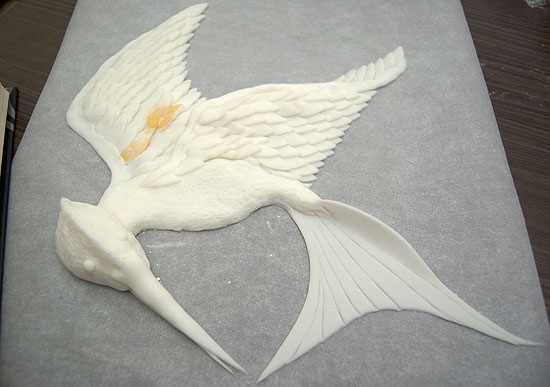
I formed the head, added the eyes and beak, and cut out the tail (all freehand). Then I took a toothpick and made the little pecks in the body and head to look like smaller feathers. I drew lines in the tail. I regretted testing that little bit of gold on Wednesday.
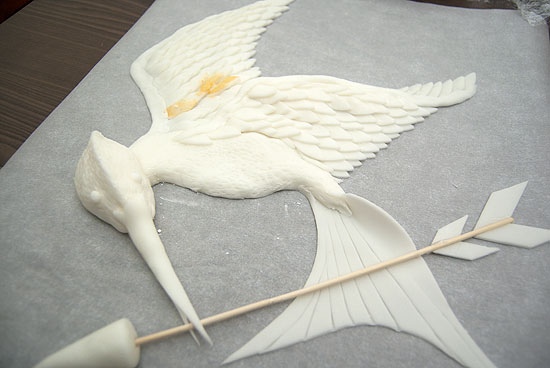
Next, I added the arrow, which is a bamboo skewer with fondant attached. The mockingjay was now complete and just needed to be painted!
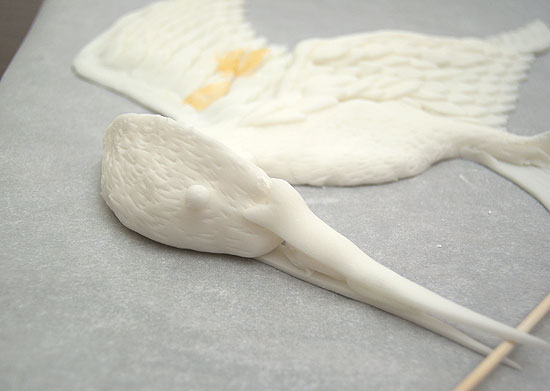
Here’s a close-up of the head. The beak looks rather ugly from the side, but I needed to prop it up so it stopped drooping down.
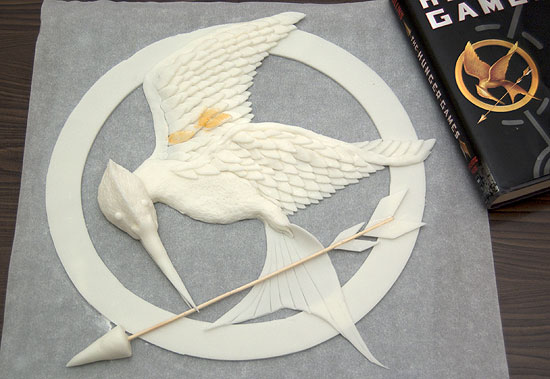
Here’s the completed mockingjay, with the book next to it as I was using it as a reference.
Next I had to paint the mockingjay with edible gold glaze, which I bought from Jesters Cake Supply. This company flat out rocks, as I placed my order Monday night and Thursday morning it was at my post office. This is after the first coat.

It was pretty sticky, so I had to let it dry over night. I covered it up with a clean pizza box cover, but was horrified to find out it was stuck to the box the next morning. Part of his head ridge came off and I painted it over when I did the second coat. When Buddy woke up, he asked to see it and I stopped him and made him say the words, “I promise I won’t touch it, Mommy.” before I showed it to him. At which point he made me feel glorious by saying, “WHOOOOOA, COOOOOOL!”
Then Baby Girl woke up and still high on Buddy’s praise, I forgot to make her swear she wouldn’t touch it. She immediately reaches out her finger to touch the bottom tip of the tail, saying, “What’s this gold stuff?” It was still wet, so it stuck to her finger and she promptly snapped it off.
**THE MOM WHO WAS ON FIRE**
After I picked myself off the floor, I reattached it with piping gel.
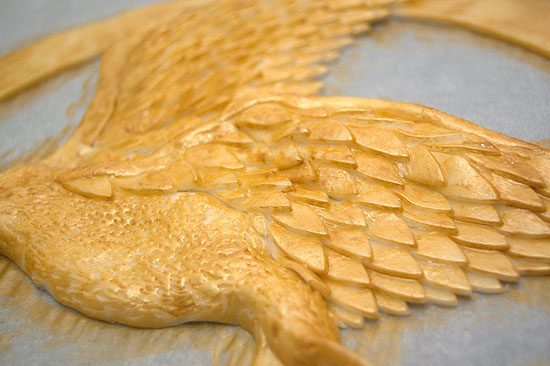
It was hard to get into the feathers, so I had to tackle this with the second coat.
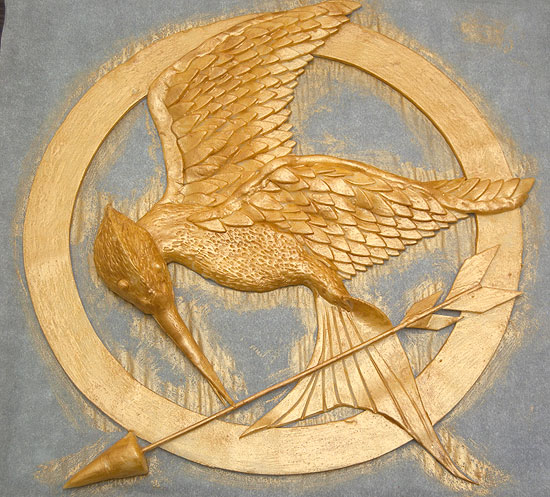
This is after the second coat. I ended up leaving this one out with a fan trained on it all night and all day, which did two things: dried out the fondant in our humid Honolulu weather and kept the bugs away. I was so freaked out that I’d find a little gnat on it, but the blowing from the fan kept them from flying over. I had tried covering it with saran wrap and that peeled off a ton of glaze and I had to re-paint it before deciding to leave it out.
On Friday afternoon, it was dry and I was able to cover the entire thing in parchment paper to wait until Sunday night.
Not wanting to deal with the stress of making a two layer cake the size of a large pizza, I bought a half sheet cake from Safeway with frosting on the side. Still, the cake wasn’t wide enough, so I had to cut off about 1 1/4 inches from the end and tack it onto the side.
Try moving a half sheet cake over 1 inch. IT WASN’T EASY!
Then, to make matters worse, I had a 1″ square of cake missing. I didn’t have enough cake! Just when I was about to start throwing a cake tantrum at the thought of having to bake a whole cake to have one inch of cake filling, I remembered that my mom had baked me a cake for my birthday and that I had a small tupperware of it in the fridge! I cut a piece off and stuck it right in and viola! I had a completed cake.
I spread a thin layer of frosting all around and now it was ready to decorate. It was 10:30 PM on Sunday.
I’d bought four pounds of black fondant from Jesters Cake Supply as well and this turned out to be twice as much as I needed for covering the cake, but for the purposes of actually rolling it out and having enough space, it was just right. It was extremely sticky, even with added confectioner’s sugar, so when I tried to do what people recommended and roll it up around my rolling pin, I was soon stuck with a rolling pin wrapped in black fondant. I started swearing, which caused Mr. Pikko to come over and help lift it up and place it on top of the cake. The rest went pretty smoothly.
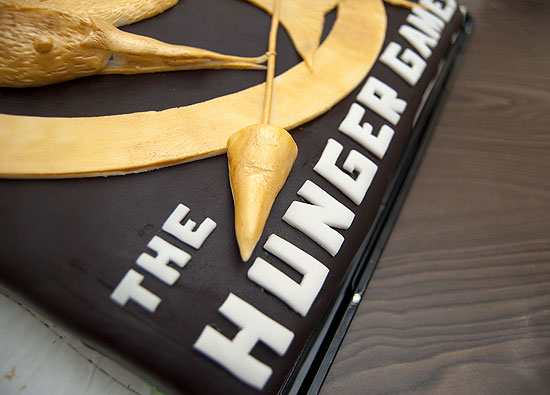
The mockingjay was so hard, I was able to just lift it off and place it on top the cake, basting piping gel on underneath with a silicone brush. I cut out letters from a paper printout and then started to cut the fondant letters. This took a really long time. I had been afraid I wouldn’t be able to fit the title, but it worked out nicely.
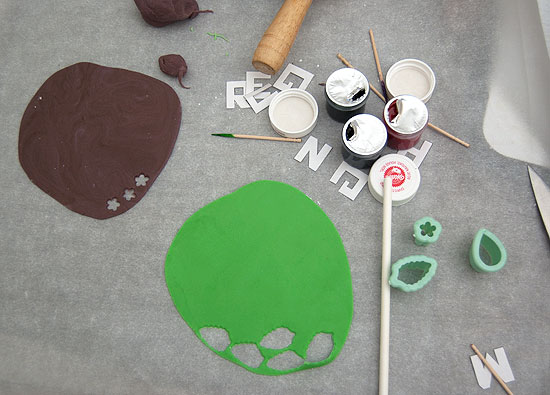
Not wanting to just stop there, I began to make some nightlock berries. I’d re-read Hunger Games just so that I could read about the berries again, but other than it saying that they kind of looked like blueberries and were dark, I didn’t have much to go on. In the end, I decided to just make them looking like dark purple blueberries. I’m quite proud of how I thought of doing these berries, as this was something I didn’t look up at all.
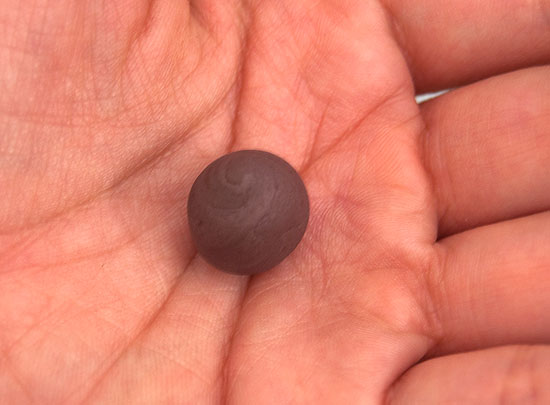
To start, I rolled a tiny amount of dark purple (white fondant mixed with purple coloring and black fondant) fondant into a ball.
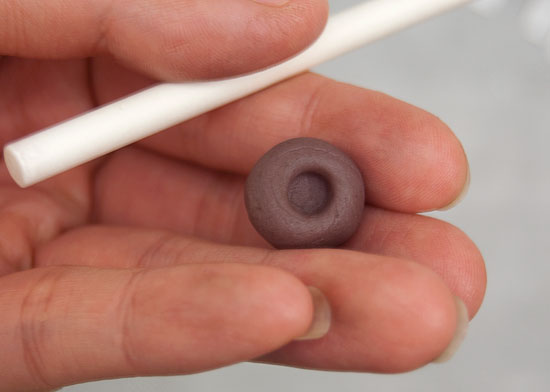
Next, I took a leftover stick from when I was making candied apples last Halloween, and made a little hole in the berry.
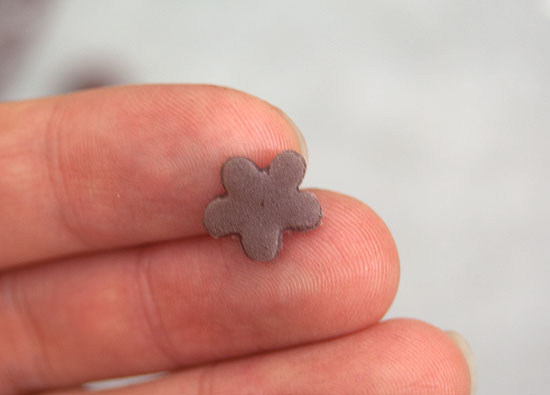
Using the tiniest flower cutter there is in my fondant kit, I cut out a little daisy.
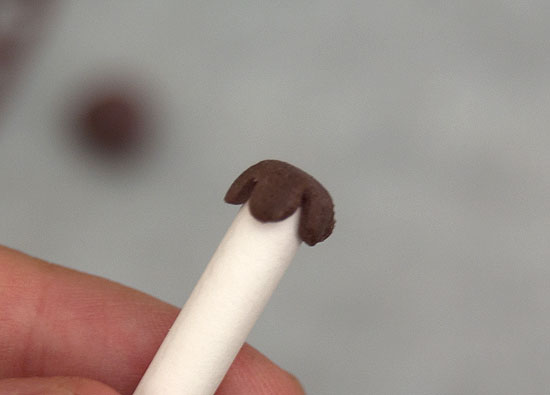
Next, I wrapped it around the lollipop stick.
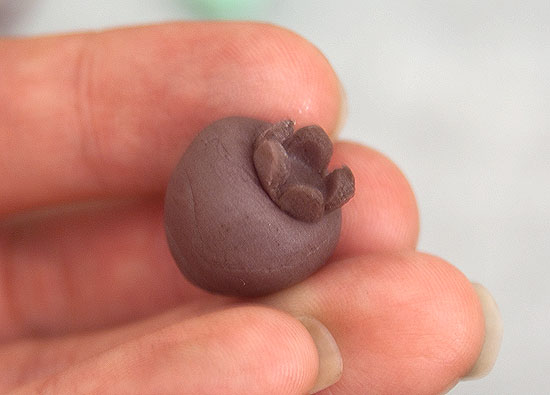
Next, I simply stuck it in the little indentation and I had my berry!
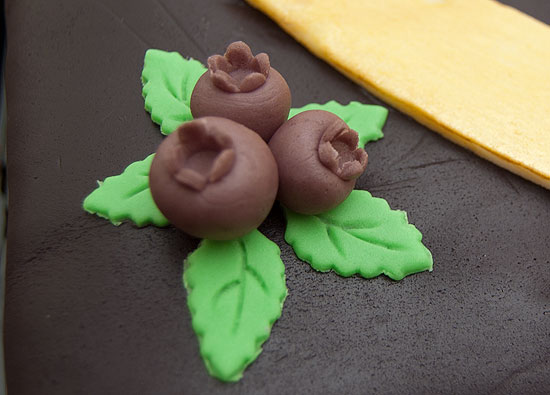
Here’s a cluster of berries and leaves. Sorry for the focus issues, but it was 2:30 AM at this point.
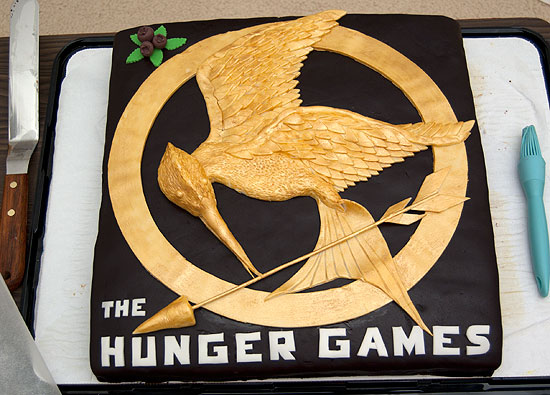
I added three sets of berries to the top, then started adding more to the sides to use up frosting.
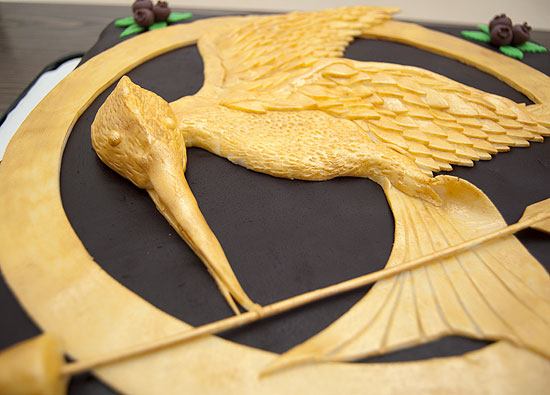
Here’s a closer look of the bird on the cake. It looks much better on black!
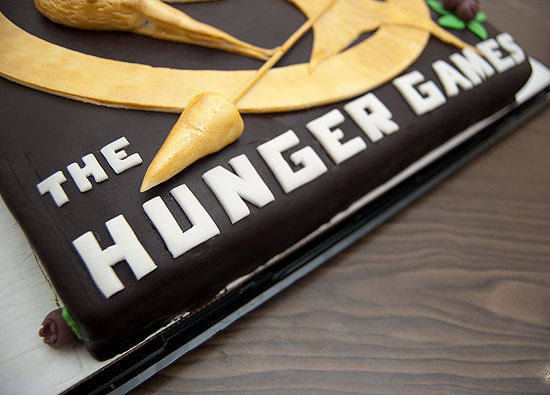
Another look at the title and you can see the side berries.
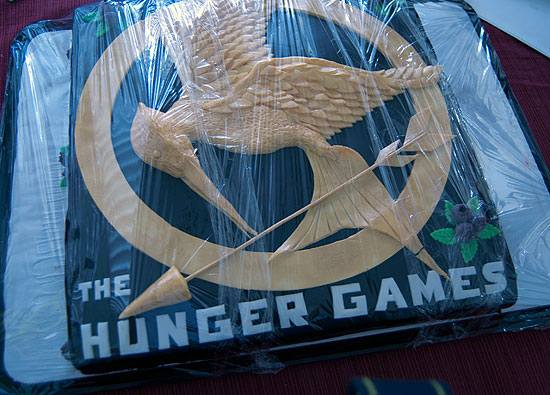
Here’s the cake all packed up to go. As you can see, Baby Girl’s handy work is again rearing its ugly head.
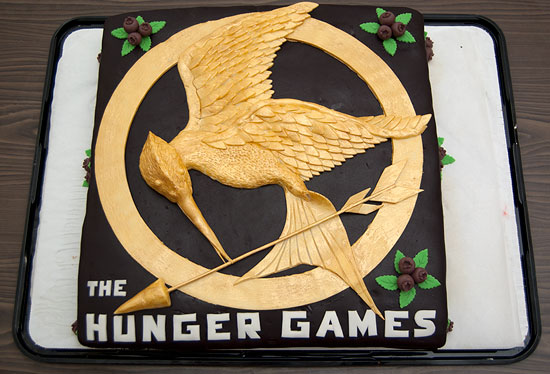
Here’s a final picture of everything all done! In total, the cake took me about 12 hours over a period of five days! Go here to find out how I did in the contest! Don’t forget to Like Learn 2 Cook on Facebook!
[ratings]


This is SO COOL! You did such a wonderful job–It’s awesome to see the process and all of the details are perfect!
Thanks Mandy!!
This cake is amazing! I love the Hunger Game series and got so excited when I saw this on Foodgawker. It’s beautiful!
Thank you!
Wow. You did a fantastic job. I must applaud your efforts.
Thank you Memoria!
That cake is amazing, super impressive! You should have won 1st in everything hands down. I haven’t read that book or series and I have read Great Gatsby and come on, people who voted for GG vs yours are horrible humans.
Thanks Robert! You could vote for up to three cakes in People’s Choice.
I wanted you to know that I’ve shown this cake to all my middle school students, who are big fans of The Hunger Games of course, and to all my booky, librarian, and reader friends. It’s gorgeous and you should have won. Can’t wait to see your next creation! I love your bentos, too, btw. Thanks for the inspiration.
Wow, thank you Suzanne! <3
Omg, this is amazing! I just made my first fondant covered cake and it took A TON of work. Oh, and I can’t believe you live in Honolulu too! 🙂
Hi Lynne! Thanks for visiting! Yes, tons of work… :O Funny that you live where I live! 🙂
I am very impressed. I really enjoyed reading this post last week. Then today I was reading the Cake Wrecks blog. On Sundays they reverse their “wreck” theme and showcase really pretty cakes, and when I read that last Sunday’s cake topic was National Library Week, I thought, they should include Pikko’s Hunger Games cake. And they did! So that was fun.
Thanks Grace! My cousin had told me to send it to them, but I forgot and I guess they saw it anyway! 🙂
Wow . This cake is absolutely amazing . my friends birthday is coming up & i planned on making a hunger games cake for her . When I saw this , I was ready to pee my pants , I was just so excited . Very much inspired . (:
oh , & how much fondant do you estimate you used making the mockingjay ?
Thanks Kayla!
Hmm, I don’t remember, but I think one package of the Wilton pre-made fondant was more than enough. You just have to roll it thin.
That is just amazing! I’m completely stunned!
Glad you like it Sarah!!
Wow, that is amazing! I am so impressed you didn’t just mimic the cover, you made it texturized/3D and added the nightberries!
Thanks weeble! I admit that my mockingjay was a bit bigger than I’d planned, haha! I almost couldn’t fit the title!
That is amazing! Do you mind if I try to make the same thing for my hunger games party for when the movie comes out?
WOW that’s all I can say. I am 13 and am turning 14 in 9 days and I really want this cake as my b-day cake. But I live in New Zealand and I was wondering if the equipment you used to make this cake was in NZ? and the cake is AMAZING 🙂
WOW. This is truly amazing. Kudos to you! So well done (and great choice as well!)
Wonderful tutorial ! I’m certainly going to use it for my birthday cake. ^^
I might actually be in love with you. This is BY FAR the best hunger games cake I have ever seen. EVER. I love the amount detail and accuracy you put into the cake and the step by step instructions are soo helpful! I will definitely have a go at making this (even though it will probably look like a gold blob compared to yours!) So yeah, thank you so much for making this, its spectacular. x
p.s follow me on twitter – https://twitter.com/primhg
Thanks for such a nice comment! Hope it turns out great!
This cake is amazing! I love it. The berries on the corners were such a nice touch instead of flowers. So much detail in the mockingjay. Amazing!
Your cake is amazing. The tutorial is wonderful. It’s nice to read about what goes wrong, now I don’t feel so bad about the fact that every time I decorate something other than cupcakes something goes wrong. Bless.you.
Merci beaucoup !!!
Thanck you very much for your tutorial …
Look at my work… https://www.facebook.com/photo.php?fbid=10200247303344040&l=0f73c10d2d
My daughter is going to be really happy because of you …
https://www.facebook.com/photo.php?fbid=10200272118964415&l=15f385c7c0
Here is my cake … MERCI …MERCI …MERCI
OMG! it is my birthday next month and i was just looking for the perfect cake, when i came across this one! it is AMAZING! i love the hunger games series and love cakes so i thought ‘why not’. thank you for making such a fab cake and inspiring me!
Outstanding cake…I am doing a three tier and needing to make the pin. I didn’t understand in your blog what you used to make the feathers. You referenced looking at something on Amazon?? Could you share what you used and possibly a link where to purchase? Thanks!