A couple months back while browsing on Amazon, I came across the Wilton Romantic Castle Cake Set and knew I had to give it a try for Baby Girl’s birthday party. We had the party yesterday and it was a crazy affair, with a total of 14 kids and a Double Cannon Blast Slide
(though we bought a different, better model of the same thing from Sam’s Club). Anyway, here’s my account of the ordeal I went through to make this cake.
First of all though, I should mention that making this cake is freaking expensive. To explain, to make the exact cake I made you will need:
- Wilton Romantic Castle Cake Set ($16.68, price has gone up since I bought it)
- 16″ cake boards ($10.19 at Ben Franklin)
- 6″ cake boards
(5.99 at Ben Franklin)
- 6 x 2 Inch Round Aluminum Cake Pan
($11.14)
- White Candy Melts
($5.59 at Ben Franklin)
- Wilton White Cake Sparkles
x2 ($4.79 at Ben Franklin)
- Wilton Artificial Clear Vanilla Extract
($2.99 at Ben Franklin)
- 10″ Round Cake Pan
($14.49 at Ben Franklin)
- Wilton Floral Collection 32-Piece Flower-Making Set
($21.99)
- #3 tip ($3.49 as a set)
- Wilton Plastic Dowel Rods
($3.99 at Ben Franklin; awful, awful product)
- Wilton Pure White Rolled Fondant
x2 ($8.99 at Ben Franklin)
- 1 lb bag confectioner’s sugar x3 ($2.50 each)
- Wilton Icing Colors
($9.80)
- 3 box cake mixes ($3.00 each on sale)
- 9 eggs (about $3.00)
- 3 sticks butter (about $4.00)
- vegetable shortening sticks (about $4.00)
All that comes out to about $159.40. Add in the 14 hours labor I put in and I’d have to charge like $250 to make this for someone else that wasn’t family.
Thankfully, the really expensive stuff is for the most part reusable. I can use the kit, the pans, the boards, the cutter set, the tips, icing colors, and rods again. Plus, I stretched the sparkles enough where I only used one bottle. Doing another castle would only require the cakes and frosting, though the next castle I have planned will require gold dust, red fondant, and square cake pans. Ugh.
I started off on Thursday night. The instructions said, “Cut 285 forget-me-nots.”
*slits wrists*
Anyway, I dyed a hunk of fondant pink.
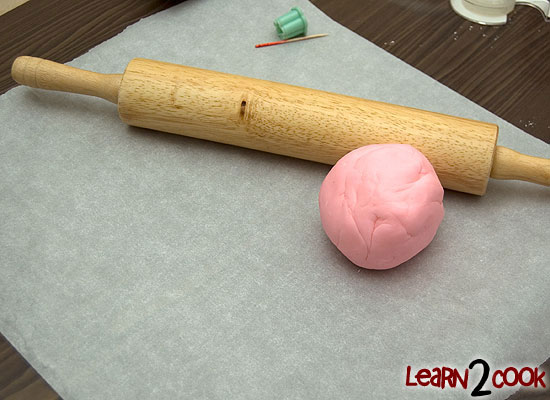
I rolled it out to 1/16 inch and began cutting. The funny part about buying the Wilton flower cutter set is the only one you need is the little flower. You’re also supposed to use the pink foam and the plastic rod to indent the flower, but I think I saw the rod in the kitchen a couple weeks ago and threw it away. Oops. Then I couldn’t find the bag with the foam, even though I’d found it after going insane looking for it with my Mockingjay cake.
I improvised and got a plastic chopstick and used my palm to press the flower middle in.
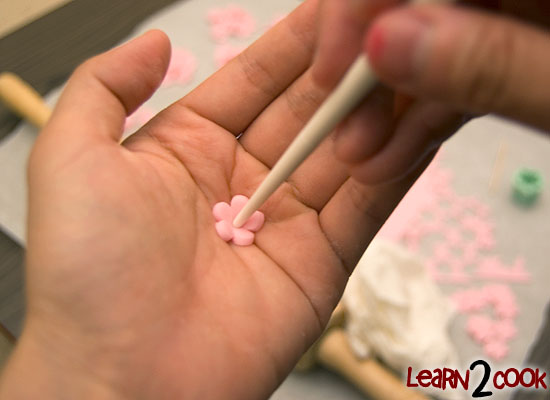
It did the job. I put them all on a paper plate to dry.
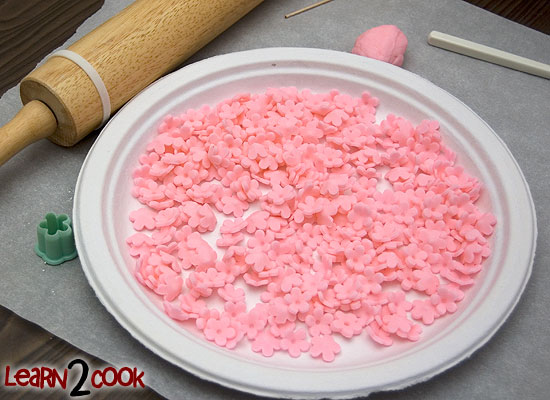
Yeah this only took me about 2 hours. I learned how to use the cutter the right way about halfway through. I had been cutting one flower, then used a toothpick to poke the flower out. But apparently the upper part of the cutter that you hold while pressing is slightly bigger than the actual cutter part, so you can cut several flowers, then push your finger through the bottom where the fondant is and the flowers all pop right out the “top”. This sped things along greatly.
The instructions say to make royal icing, but I didn’t have meringue powder and neither did the store. Instead, I used little fondant balls. I rolled out white fondant, then cut little circles out with a coffee straw. This was a bad idea, because I had rolled it too thin and so I had to cut two circles for each ball. Just this very second, I realized I should have just switched to a regular straw. ARRGH!
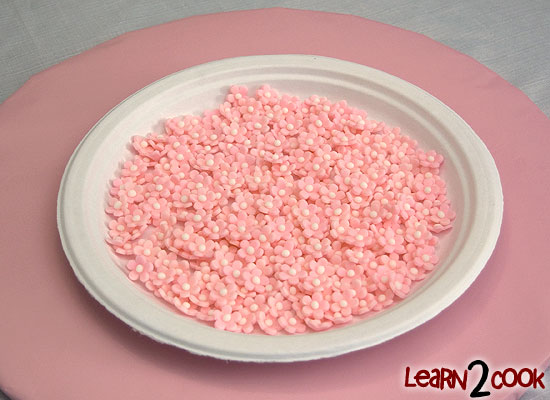
I attached the balls with piping gel, which Baby Girl cutely calls “pipping gel”. I cut out 310 just for good measure. I have to say, making these with fondant middles requires some serious mental stability. I made about 100 before I began to get exhausted and nauseated. Seriously, making these made me sick.
The next day, I started on them again. This time Baby Girl wanted to help, so I let her do the cutting of the white and rolling them into balls. After about 30, she started to sigh loudly and told me how much making the balls sucked and could I please roll them for her instead of vice versa? lol
Eventually, I let her roll and attach and that was better for her. But really, making this many makes you crazy.
Friday morning, I made a batch of buttercream frosting using Wilton’s recipe in the instructions. Each batch requires 4 cups of sifted confectioner’s sugar. Wow.
When I got home on Friday, I began baking the cakes. I figured I could make one 6″ and one 10″ cake with one box mix. Since I had only one of each pan, this made the most sense anyway, since I had to cool the cakes before I could use the pan again. When I had all four layers cooled and ready, I began layering. I started with the 6″ cake, putting it onto a 6″ cake board.
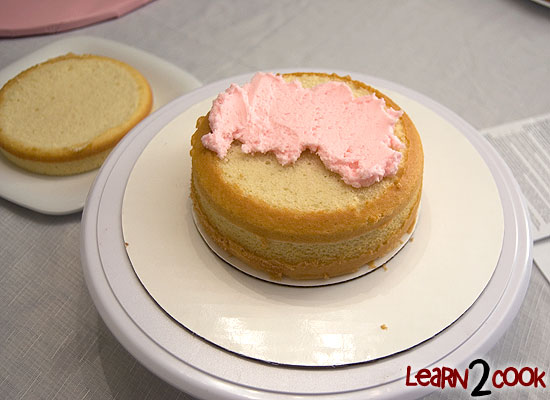
My bottom layer was really fat. I didn’t measure really well for the first cake. I cut the top off using a Wilton Cake Leveler. I colored the icing pink with more icing color and began to put it on the cake. I put the next layer on top, then smeared more into the spaces between the layers to have an even side.
A word of advice if you make this cake during the warm season or live in Hawaii, you cannot use straight up buttercream to ice cakes. The butter will melt and your cake will start slipping and sliding. Use half shortening and half buttercream. This will enable the frosting to keep a sturdier consistency.
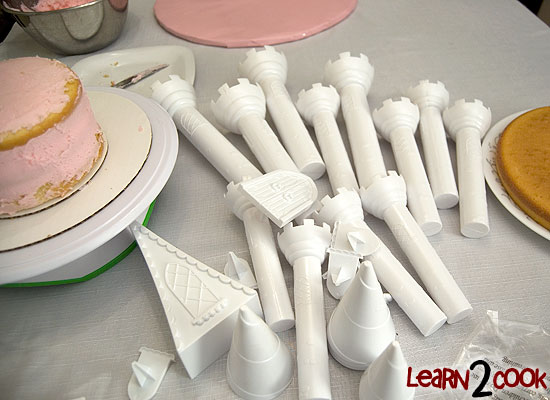
Here are all the pieces of the cake set with my iced cake on the left.
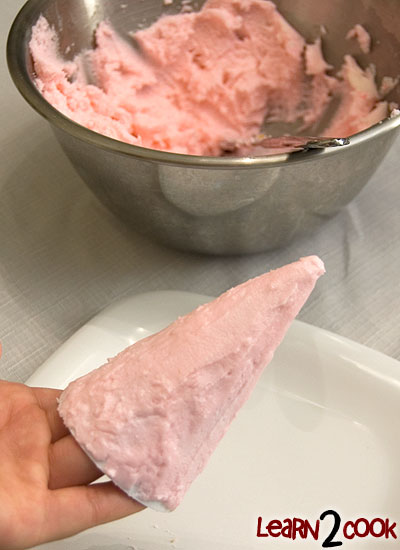
For the roofs, you had to ice the plastic roofs from the kit. This was really annoying. The kit comes with patterns for cutting out fondant for the roofs and I am definitely going to do that next time. Just make a copy of the pattern before you use it so you can use it again for another castle.
After I frosted it, I sprinkled the cake sparkles on. I still had to layer the next cake, but I wanted to try this to see what it was like. It was hard to handle after it was frosted.
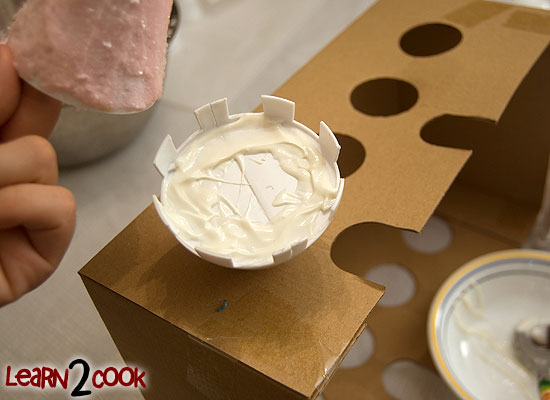
To attach the roof to the turret, you had to put melted chocolate on and then put the roof on and let it dry.
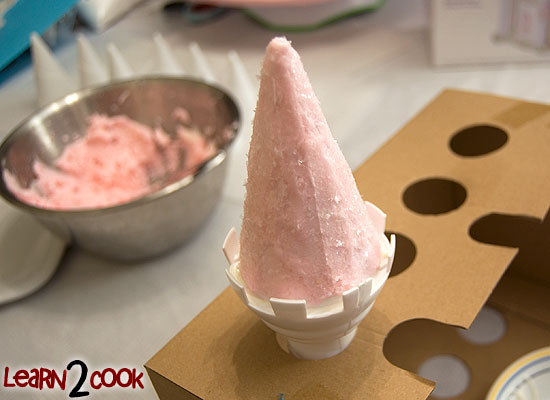
Here’s a completed turret. I kept the castle box to use it to hold them while they dried.
Anyway, back to the cakes.
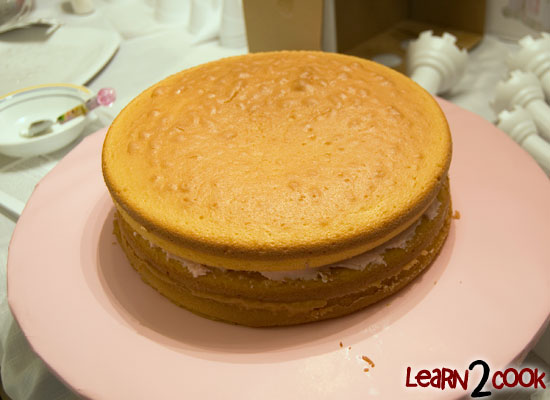
Here’s the 10 inch cake. You can see that it’s on top of a pink board. It’s actually three 16″ cake boards wrapped in aluminum foil and then wrapped in pink wrapping paper. I didn’t really like the way cakes look on silver, so I went with the wrapping paper. I’m really glad I did! The great part about wrapping the board is that you can use the board again. You have to use three so that it actually supports the weight of the cake. It’s ridiculously heavy.
Looks great so far, right?!
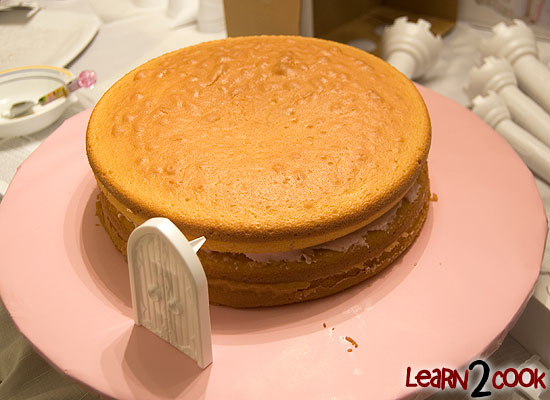
Noooooooooooooooooooooooooooooooooooooooooo….
Yes, the door was too tall. Or rather, my cake was too short. I had to go and bake another cake. Thank goodness I’d thought to buy three boxes.
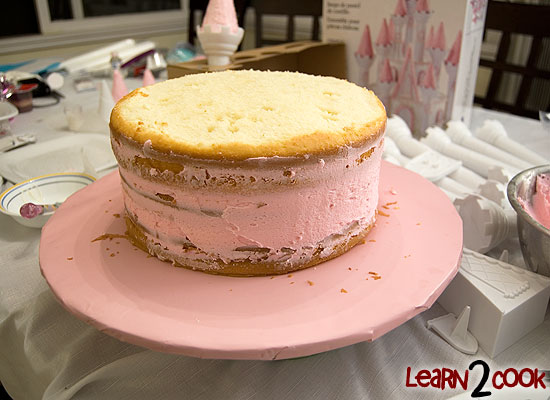
This was my first three layer cake. I was quite proud of myself.
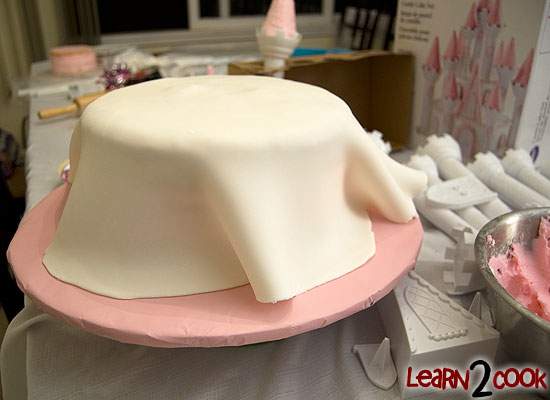
I rolled out a whole package of fondant and covered the cake. I’m still getting the hang of doing this to round cakes and it came out pretty horrible, with folds all over the place.
This is where disaster struck. I had to layer the cake, which meant I had to insert the dowels to support the upper layer. The instructions on the dowel package says to use a serrated knife or kitchen shears. I went with the knife. The problem is, the dowels are made out of very slippery thick plastic.
I cut one piece, then was doing the next when my knife slipped and I sliced my left thumb tip open. It was so bad that I had blood flowing openly down my hand as I ran to the bathroom. Those steak knives aunty gave me for my wedding were still damned sharp…
It was hurting like crazy, so I said the hell with pouring hydrogen peroxide on it and just washed it out, put neosporin, and wrapped it up SUPER tight with bandaids to help stop the bleeding. I’d been holding it tight with Kleenex and after about 5 mins it just wasn’t stopping, so I just had to seal it up and keep going. 36 hours later and it’s still sensitive, but has already closed up and I can keep it bandage free. It looks horrible though. That makes my third bad knife slice on fingers this year. 🙁
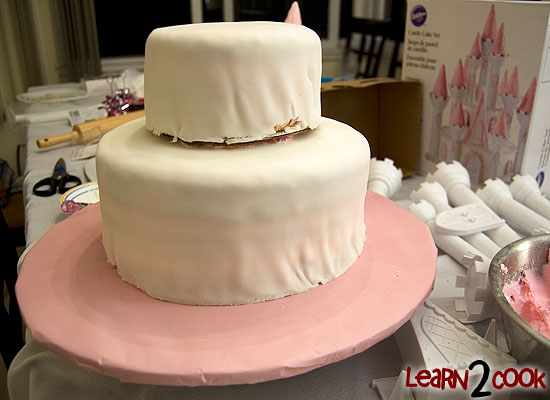
Here’s the layered cake. Fricking dowels. After all that crap they were too tall. I was pissed, so I just kept going, figuring I could just frost around the base. Sadly, you could see the pink frosting and cake underneath the fondant, so next time I think I’ll just go with buttercream all around.
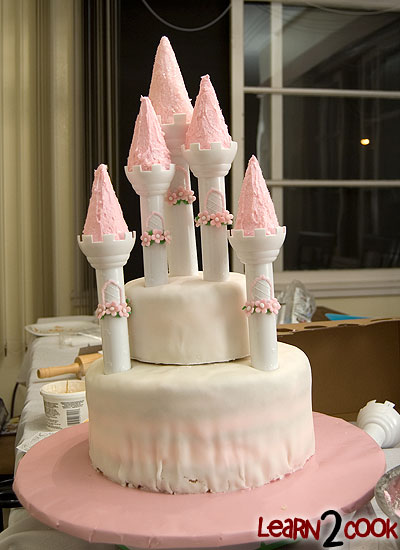
It took me two batches of pink frosting and one of green to have enough for the cake, though the green one you can just do a half batch. I was lazy, so I used my refrigerated frosting from Easter. It seemed like such a waste not to use it and it was fine.
This is the part that was incredibly frustrating. The instructions said to cut a dowel rod 1″ shorter than the cake, then attach the dowel rod to the turret with melted white chocolate. The problem here is I tried holding the pieces in place while it dried and it just wasn’t working for me, so I just shoved the dowels in and pushed the turret in after. They weren’t very sturdy and a cake with buttercream probably would have held the turrets to the side a lot better.
I think it might have worked better if the dowels weren’t hollow. They just weren’t sticking to the bottom of the turret. Maybe covering the top with wax paper and then rubber banding it down would make the chocolate adhere better because the bottom of the turrets are flat.
Before I inserted them, I piped on the pink window outline and then the green “leaves”. I bought a leaf tip, but I couldn’t figure out how the frick to use it, so I just oozed green in a fat line and put the flowers on. No one noticed.
After this point I got sick of taking pictures.
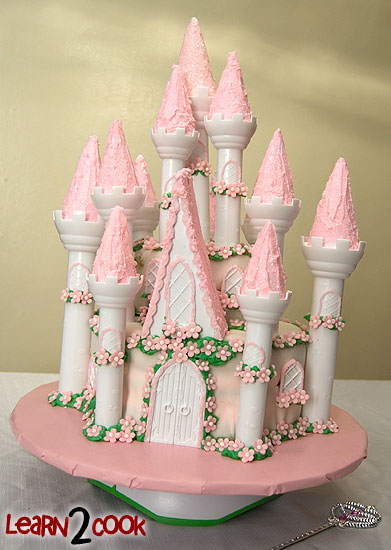
Final cake! Complete with sagging roof! My darned cake was tilted on this side. The next day, I slipped a white wafer underneath and that made it nice and straight.
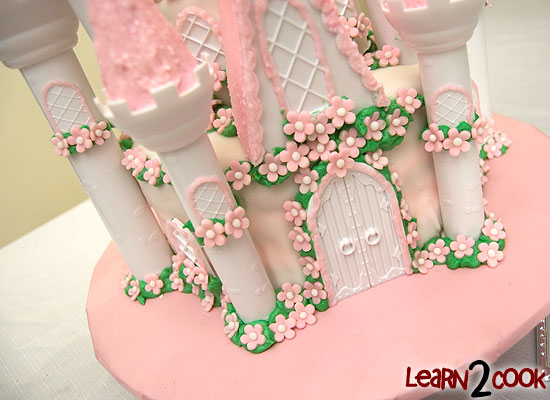
Here’s a close up of the front of the cake. The windows and door are all frosted and then pushed into the cake.
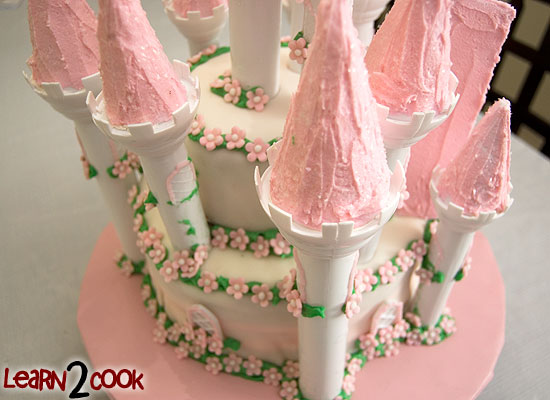
Here’s the side. As you can see, some of the flowers fell off this windowsill. I really should have made new buttercream as the Easter one was regular buttercream, not the half shortening one.
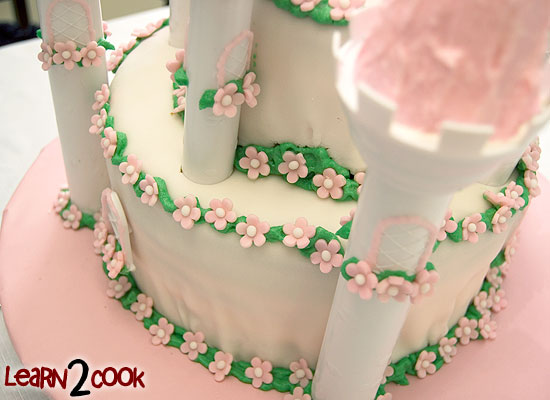
Here’s the back of the cake.
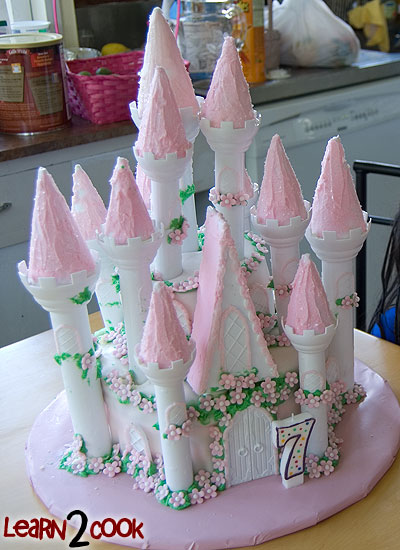
And here’s the cake the next day, just before singing time. By this time, four turrets had fallen off multiple times and eventually I just stuck my fingers in and removed the dowels, then pushed the turrets in far enough where they could hold themselves up. This worked infinitely better than having dowel supports.
In the end though, none of the kids noticed the flaws I saw and the only complaints I got were that they couldn’t eat the roofs.
The castle set itself is very cool as it includes instructions for three different cakes, including a medieval stone castle cake. The windows are very easy to use. My only complaint is the instructions. They’re all in one big paragraph and very difficult to read. The dowels sucked and I won’t be using them again. 1″ is definitely not enough to keep the turrets up.
[ratings]

Edible roofs: ice cream cones
I could never make that, I don’t have the patience (or is it insanity?) to spend that much time on a cake.
It looks really awesome though, and I’m sure that Baby Girl will remember it for years to come, which is the entire point. 🙂
Phew that’s a lot of cake. See your process though I can kinda see where you might not need the set. Maybe on your next one you should dirty ice it all around with white buttercream and then put on the fondant?
That’s a nice idea! And yeah, I hope she remembers it for years!
It was a lot of cake!
Hmm, good idea about the icing, but for this one probably not possible since I was dead on my feet! 😀 I’ll definitely make extra frosting for the next castle though.
A great replacement for plastic/wooden dowels are the really fat bubble (or boba) tea straws, and they’re easier to cut!
Wow, you’re a genius!! I even had some too!
What a wonderful Mommy you are, it is beautiful. As always. 😀
your daughter is soooo lucky to have a mom like you that spends all that time and money to bake a cake. sooooo lucky! it looks SO nice!
What a beautiful cake! I love all of your flowers! I can’t believe how much work you put into it, you really are a dedicated mom.
We have made two “castle” cakes with this Wilton set. One was a Harry Potter inspired stone castle. I added black food coloring to the fondant in stages, not mixing it in perfectly, so I had streaky gray stone color. I wrapped this around the turrets, then used plastic pointed citrus peeler to add stone “lines”. It looked cool – but I am not patient enough for all the decorating! And this only took about two hours to complete! A few weeks later we made a girl princess cake – and I left all the turrets plain white, no frosting or fondant. I wrapped the “cones” in a thick ribbon, and added flowing ribbons where they attached. It looked very festive – and took much less time. (The ribbons matched the pink/purple cake frosting, which we did use to outline the doors and windows.) Just an idea to make it faster next time! 🙂
Thank you Cliff! 🙂
Thanks Jamie, I just wish I had fixed the leaning roof before I snapped the last photo, sigh!
Haha, thanks for giving me ideas! I want to do a Harry Potter party next month for the last movie and I’ve been thinking about what kind of cake to make!
Oh my gosh Pikko… you outdid yourself! I was tired for you after reading about the flowers! I would have killed myself then and there and called it a day w/ a Costco cake! LOL! It came out beautiful and I didn’t even see the flowers had fallen off the window till you menitoned it. Your daughter is a lucky girl! Happy Happy Birthday!
P.S., Back from Oahu/Maui vacay– visiting all the relatives and thought of you when I went to Marukai and almost died in their bento section! Such cute stuff, but was overweight in luggage (yeah and overweight from eating too), so I had to forego the $18.00 quail egg cutter.
Soooooooo glad I found your site! I bought this kit last weekend and have been agonizing about it since. I’m going to attempt to make the cake for my daughter’s 5th birthday this Saturday. I bought all the things I’m willing to buy (not everything recommended) but reading your post has me reconsidering some things… like 3 cake boards instead of one, the dowels (I bought the wooden set of 12 but am wondering if I need more)… and that maybe I need another box of cake. I’ve read on other reviews that people drill holes in the turrets to insert wooden dowels and that it works better (we’ll see, as that’s what I’m going to do). Also, I bought the fondant in addition to getting ready to ice it all with buttercream.. not sure which is easier! 😉 And I refuse to make all those flowers. I have little patience as it is.. so I KNOW I will lose my sanity if I invest the time in that! Instead, I’m going to use the decorative caps on ready-made frosting tubes and pipe on the flowers with the star filter. Won’t look nearly as pretty but they’re 5 and won’t notice. Enough said. 😉 I will try to make this cake with as little nausea (funny!) and achy feet as possible, so it’ll be a simpler version of the beautiful picture on the box and your beautiful result. You did a SUPER job and I commend you for taking the time to do it and then post pictures and discription of it here. It REALLY REALLY helps!! Thank you!! (and wish me luck! I’ll need it!)
Yeesh, all I can say is GOOD LUCK! I hated those dowels so much. Let me know how the wooden ones go!
Hey there my loved ones new member! I wish to claim that this informative article is awesome, pleasant written and are avalable with roughly many sizeable infos. I’m going to find excess discussions like this .
Yep, The Fat Bubble Tea straws are what the pros are recommending now instead of dowels. You can just cut them with a pair of scissors. My daughter is about to make this cake and place it on top of an empty pillar tier with flowers which is on top of a 14″ cake tier which tops a flowing fountain surrounded by flowers and a princess doll cake to sit beside the whole thing….**NIGHTMARE AHEAD OF US*** LOL Its for her LAST school project before graduation next month! Heaven help us!
So, How DID your cake turn out? Did the wooden dowels work ok with the holes drilled in the turrets? That is my main concern with this cake, making sure the dowels don’t fall.